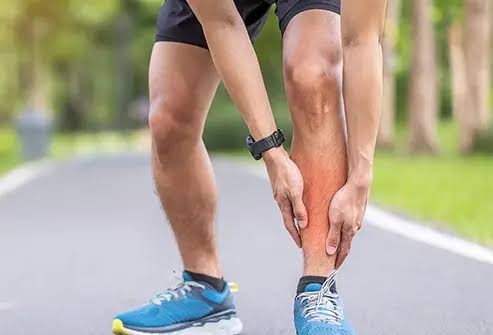
Shin Splints Won't Fix Themselves: Here's What Actually Works
Shin Splints Won't Fix Themselves: Here's What Actually Works
Your shoes are sitting by the back door, laces still tied from last time. The Saturday morning loop, or that parkrun you've been chipping away at your PB on, it's all on pause. Your shins have been niggling for a week or two now, and Dr Google is telling you the same thing everyone gets told: rest up for a month, ice it, stretch the calves, and hope for the best.
Can I be straight with you? That advice is why so many runners end up back in the same scenario more than once.
Rest Isn't Recovery
Here's what actually happens when you back off completely. Your body isn't using that time off to quietly patch itself up and come back tougher. It's doing the reverse. Muscles lose condition, tendons lose their springiness, and bone stops adapting to load; all while you're doing what seems intuitively right.
So a month later, you pull the shoes back on, head out for your usual loop, and try to slot straight back into your old training. Except your legs can't handle what they used to. You're asking a weaker version of yourself to do the same job; and the shin pain doesn't just return, it comes back faster and angrier than before.
That's not rehab. That's just delaying round two.
What actually works, and what we lean on with runners training for their local parkrun or working toward a Hyrox, is keeping the tissue loaded. However, it needs to be just dialled down to a level it can currently manage, then built back up properly.
What's Really Going On Under the Surface
Your shins aren't fragile. They're just running a temporary deficit, and there are usually a few things stacking up at once.
Your bone bank account is overdrawn. Bone is living tissue, constantly breaking down and rebuilding depending on what you throw at it. Every run is a withdrawal. Every solid sleep, rest day, and proper feed is a deposit. Push the withdrawals too hard for too long without enough deposits, and the inner edge of your shin bone starts flashing red.
Your calves have gone flat. Your calf and Achilles are meant to work like a loaded spring, storing energy on landing, firing it back out with each stride. When they're overcooked, that spring doesn't do its job properly, and the force that should've stayed down there gets shunted straight up into your shin instead.
Your pain gauge is running hot. This one throws people. Pain and actual damage in the tissue aren't as tightly linked as you'd think. Your nervous system can get a bit trigger-happy, flagging danger well before there's anything worth worrying about. The tissue underneath is usually healing just fine; it's the warning system that's stuck on high sensitivity. Reintroducing load gradually and predictably is what settles that back down.
Know Where You Sit: "Niggle" or Genuine Problem?
Runners can be a stubborn bunch, most of us push through until we physically can't. So it’s worth knowing where you actually sit:
- Cruising: no pain, nothing to report.
- Normal soreness: mild tightness, feels like any other tough session, gone within a day or two.
- The niggle: a dull, nagging ache that hangs around session after session. You can run through it, but it never fully clears. This is your early warning light. The training load is starting to outpace what your shins can absorb.
- The sharp one: a stabbing pain that pulls you up mid-stride.
- The proper injury: persistent, worsening, and forcing you off the road for days or weeks.
Sitting in "niggle" territory right now? Good. That means you've caught this early enough to fix it before it becomes an even bigger problem.
Your Comeback Plan: 4 Steps That Actually Hold Up
Forget passive rest. This is about rebuilding your tissue's tolerance in a structured way, so you close the gap between where you're at now and where you want to be, without blowing it up again.
Step 1: Prove Your Shins Can Handle Impact
Before you run a single step, your body needs to show it can cope with basic loading first. You'll want:
- Five straight days completely pain-free with everyday stuff like walking
- A clean pass on this quick checklist:
- Brisk 30-minute walk
- Single-leg balance, 30 seconds, eyes open
- 15–20 controlled single-leg knee dips
- 20–30 controlled single-leg calf raises, each side
- 10 forward hops on your dodgy leg, landing soft and controlled
If the hopping brings pain, that's your answer: you're not ready to run yet. That's not a setback, that's useful information.
Step 2: Find Your Starting Point
Get onto a treadmill if you can, it's forgiving underfoot and lets you hold pace exactly. Five-minute brisk walk to warm up, then run easy and conversational for as long as it stays comfortable. First hint of an ache, stop and note how far you got.
Take 10-20% off that number. Ran three pain-free kilometres? Your real starting point is somewhere around 2.4-2.7 kilometres. That buffer keeps you well clear of flare-up territory while you rebuild.
Step 3: A Bit of Discomfort Is Fine, But Don't Push Through Pain
As the mileage builds back up, mild discomfort during a run is normal. The rule of thumb:
- Keep it at 3/10 or under
- It should be fully gone within 24 hours
- Sore the next morning, or trending worse week on week? You've gone too hard, drop back to your last comfortable distance and reset
Step 4: The 10% Rule Still Applies
Loading too much, too fast is the single biggest reason runners end up back at square one:
- Don't bump weekly mileage by more than about 10% from one week to the next
- Change one thing at a time. Adding distance this week? Leave pace and hills alone until next week
- If you're tracking load, keep an eye on your 7-day vs 28-day average (acute-to-chronic ratio). Somewhere between 0.8 and 1.3 is the sweet spot, get much past 1.5 and your injury risk climbs fast.
- Pace, distance and elevation are all training variables that need to be manipulated carefully. A spike in any one could tip a runner into overtraining and increase the risk of developing an injury.
The Strength Work To Bulletproofs Your Shins
Rest doesn't raise your ceiling. Strength does. One solid session a week of slow, heavy resistance work does more for long-term shin health than any amount of stretching:
- Heavy single-leg calf raises (bent knee): Stand on a step, knee bent to roughly 30 degrees, hold a heavy dumbbell on that side, lower and raise slowly. Targets the soleus, the muscle doing most of the heavy lifting on impact.
- Straight-leg calf raises: Same movement, straight knee this time, to build the upper calf (gastrocnemius).
- Tibialis anterior wall pulls: Lean back against a wall, feet stepped out in front, lift your toes up toward your shins. Strengthens the front-of-shin muscle that balances out all that calf pull.
Setbacks Aren't Failure, They're Part of the Process
A flare-up doesn't mean you're back at zero. Back off for a couple of days, let it settle, reset your baseline, and start building again.
Whether you're chasing a sub-25 at a parkrun or just trying to get through your first Hyrox without your shins staging a protest, your body responds to the right stimulus, not none at all. So stop parking the shoes by the door and start rebuilding properly. There's mileage waiting for you.
Currently wrestling with a shin niggle? Drop a comment with your weekly mileage and where you're at in your training block. We’re happy to help you figure out a plan to get back out there.